8 Best Practises for Swift Prototype Development
You’ll be amazed to know that 70% of successful products are built with swift prototypes.
So, if you’re looking to innovate and stay ahead of the competition, you need to master the 8 best practises for swift prototype development.
From user-centric design to scalable architecture planning, these practises will empower you to create and iterate on prototypes with agility and precision.
Get ready to revolutionise your prototype development process and drive innovation like never before.
Key Takeaways
- Prioritise user needs and preferences in Swift prototype development
- Regularly revisit and revise prototypes based on useability testing and feedback
- Choose essential tools for efficient prototype creation and iteration
- Implement a comprehensive continuous testing and validation strategy
User-Centric Design

When designing prototypes in Swift, prioritise user needs and preferences to create a more intuitive and engaging user experience. User empathy lies at the core of design thinking. Understanding the user’s motivations, behaviours, and pain points is crucial to crafting a prototype that resonates with them. By putting yourself in the user’s shoes and empathising with their journey, you can gain valuable insights that inform the design process.
Design thinking encourages a human-centred approach, where the focus is on creating solutions that address real user needs. By embracing this mindset, you can uncover innovative ways to enhance the user experience. Consider conducting user research, gathering feedback, and iterating on the prototype based on user input. This iterative process allows you to refine the design iteratively, ensuring that it alines with user preferences and expectations.
Rapid Prototyping Tools
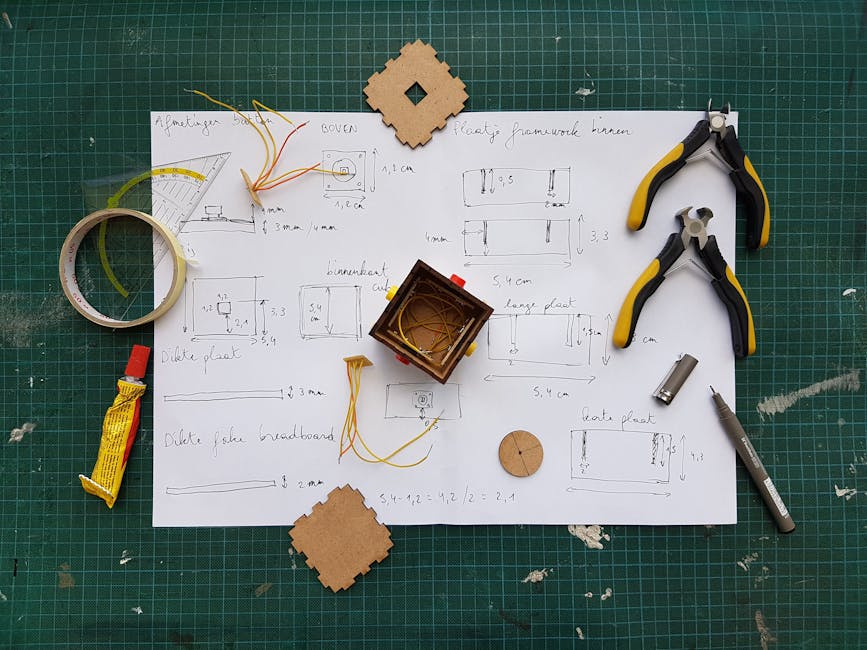
Now, let’s talk about the essential rapid prototyping tools that can help you streamline your development process.
You’ll need to carefully consider the specific requirements of your project in order to choose the right tools for the job.
Essential Rapid Prototyping Tools
To begin rapid prototyping in Swift, you’ll need a set of essential tools to efficiently create and iterate on your prototypes.
Design thinking is crucial in this phase, as it helps you understand user needs and define the problem you aim to solve.
Interactive prototyping tools such as Figma, Sketch, or InVision enable you to quickly translate your ideas into interactive mock-ups, allowing for user testing and feedback early in the development process.
These tools facilitate rapid iteration, ensuring that your prototypes evolve in line with user requirements.
As you progress into the subsequent section about ‘choosing the right tools’, it’s essential to consider the specific features and capabilities that aline with the demands of your Swift prototype development.
Choosing the Right Tools
As you progress into the next phase of prototype development, you should carefully assess and select the rapid prototyping tools that aline with your specific requirements and support the iterative nature of Swift prototyping.
When choosing the right tools for rapid prototyping, consider the following:
-
Tool Compatibility and Useability: Opt for tools that seamlessly integrate with your existing development environment and offer a user-friendly interface to enhance productivity.
-
Development Environment and Compatibility Testing: Prioritise tools that are compatible with your development environment and facilitate thorough compatibility testing to ensure the prototype functions as intended across various platforms.
-
Support for Iterative Development: Look for tools that support iterative development processes, allowing for quick feedback loops and efficient refinement of the prototype.
Careful consideration of these factors will lead to the selection of tools that best support your swift prototype development needs.
Feedback Loops Implementation

When implementing feedback loops in your Swift prototype development, it’s crucial to embrace an iterative design process that allows for continuous improvement.
Integrating user testing into the development cycle ensures that your prototype meets the needs and expectations of your target audience.
Iterative Design Process
Implement feedback loops throughout the iterative design process to continuously refine and improve your Swift prototypes. Embrace a user-centred approach to ensure that your prototypes meet the needs and expectations of your target audience.
Here’s how you can effectively implement an iterative design process:
-
Design Iteration: Regularly revisit and revise your prototypes based on insights gained from useability testing and user feedback. This iterative approach allows for continuous improvements and ensures that the final product alines with user preferences.
-
User-Centric Prototyping: Prioritise user feedback and integrate it into each iteration of your prototypes. By involving users throughout the design process, you can create solutions that truly resonate with their needs and preferences.
-
Rapid Experimentation: Embrace a mindset of rapid iteration, allowing you to quickly test and implement changes based on user input, leading to more innovative and user-friendly Swift prototypes.
User Testing Integration
To effectively integrate user testing and feedback loops into your Swift prototype development process, prioritise regular and iterative user involvement.
User testing allows you to gather valuable insights into how real users interact with your prototype, enabling you to make informed design decisions.
By incorporating feedback loops, you can quickly implement changes based on user input, ensuring that your prototype alines with user expectations and needs.
When integrating user testing, consider creating a seamless feedback mechanism that encourages continuous user input throughout the development cycle.
This approach fosters a user-centric mindset and promotes a culture of continuous improvement, ultimately leading to a more refined and user-friendly Swift prototype.
Embracing user testing and feedback integration empowers you to create innovative solutions that resonate with your target audience.
Continuous Improvement Approach
As you progress with integrating user testing and feedback loops, adopt a continuous improvement approach to iterate on user input and refine your Swift prototype. Embrace feedback analysis to drive innovation and enhance the user experience.
Here’s how you can effectively implement a continuous improvement approach:
-
Real-time Feedback Collection: Utilise tools and methods to gather user feedback continuously throughout the development process.
-
Iterative Development: Implement a rapid iteration cycle based on feedback analysis to make incremental improvements to the prototype.
-
User-Centric Design Refinement: Prioritise user needs and preferences, and consistently refine the prototype to aline with user expectations.
Cross-Functional Collaboration

Work with designers, engineers, and other relevant stakeholders to ensure effective cross-functional collaboration in Swift prototype development. Team communication and problem-solving are vital in this process. By fostering interdisciplinary collaboration, you can harness the diverse expertise of your team to drive innovation. Encourage open communication channels, allowing for the seamless exchange of ideas and feedback. This approach not only enhances the quality of the prototype but also promotes a culture of continuous learning and improvement within your team. Embrace a problem-solving mindset and leverage the unique perspectives of each team member to overcome challenges and drive the project forward.
Engage in collaborative design thinking sessions that bring together the creative insights of designers, the technical expertise of engineers, and the strategic input of other stakeholders. Cultivate an environment where every team member feels empowered to contribute their ideas and expertise. By doing so, you can tap into the full potential of your team and produce prototypes that aren’t only technically sound but also innovative in their approach.
Transitioning into the subsequent section about ‘agile development methodology’, it’s essential to integrate the cross-functional collaboration approach into an agile framework to ensure seamless development processes.
Agile Development Methodology
Integrate the cross-functional collaboration approach into an agile framework to ensure seamless development processes. Agile methodology emphasises adaptability, collaboration, and iterative progress, fostering an environment conducive to swift prototype development. By embracing agile principles, you can enhance team collaboration and project management, ultimately driving innovation and efficiency in your development process.
Incorporate these agile best practises for swift prototype development:
-
Scrum Framework: Implement a scrum framework to facilitate short, focussed work periods called sprints. This approach promotes regular feedback, continuous improvement, and adaptability, essential for swift prototype development.
-
Kanban Method: Utilise the Kanban method to visualise workflow, limit work in progress, and maximise efficiency. By actively managing tasks and workflow, you can streamline development processes and swiftly address any bottlenecks.
-
Daily Stand-up Meetings: Conduct daily stand-up meetings to foster transparent communication, identify potential roadblocks, and promote quick decision-making. These brief, daily gatherings keep the team alined and focussed, driving rapid progress in prototype development.
Continuous Testing and Validation

Implement a comprehensive continuous testing and validation strategy to ensure the reliability and functionality of your Swift prototypes throughout the development process. Test automation plays a crucial role in enabling iterative development and feedback integration. By automating tests, you can quickly validate each iteration of your Swift prototype, ensuring that new features and enhancements do not introduce regressions or break existing functionality.
| Continuous Testing and Validation | Benefits |
|---|---|
| Test Automation | Accelerates testing processes, allows for frequent testing, and facilitates early bug detection. |
| Validation Process | Ensures that the prototype meets the specified requirements and functions as intended. |
| Iterative Development | Enables rapid iteration and refinement of the prototype based on continuous testing and user feedback. |
| Feedback Integration | Incorporates user feedback into the development process, leading to a more user-centric and effective prototype. |
This approach fosters a more efficient and effective development cycle, ultimately resulting in a higher quality Swift prototype. Embracing continuous testing and validation empowers you to deliver innovative solutions with confidence, knowing that your Swift prototype has undergone rigorous and ongoing validation.
Iterative Improvement Process

To enhance the reliability and functionality of your Swift prototypes, continue refining the iterative improvement process based on continuous testing and user feedback. As you strive for innovation, the iterative improvement process plays a crucial role in refining your prototypes and ensuring they meet the needs of your users.
Here are three key aspects to focus on as you iterate and improve your Swift prototypes:
-
Design Validation: Regularly validate the design of your Swift prototypes to ensure that they aline with the user requirements and expectations. By conducting design validation exercises, such as useability testing and user interviews, you can gather valuable insights to refine the design and enhance the overall user experience.
-
Prototype Iteration: Embrace an agile approach to prototype iteration, allowing you to make incremental improvements based on user feedback and testing results. By continuously iterating on your prototypes, you can adapt to evolving user needs and preferences, ultimately leading to a more refined and effective product.
-
User-Centric Refinement: Prioritise user-centric refinement during the iterative improvement process, focussing on addressing user pain points and enhancing the useability of your Swift prototypes. By actively involving users in the refinement process, you can create prototypes that truly resonate with your target audience.
Scalable Architecture Planning

When developing Swift prototypes, you should plan for a scalable architecture that can accommodate future growth and evolving requirements. Architecture scalability is crucial for ensuring that your prototype can handle increasing demands as your project evolves. Planning for growth and resource allocation from the outset will set the stage for a successful and sustainable prototype. Flexible design strategies are essential for adapting to changing needs and incorporating new features without requiring extensive rework.
Consider the following table to help you understand the importance of scalable architecture planning:
| Key Points | Description | Benefits |
|---|---|---|
| Architecture Scalability | Ensure your prototype can grow with your project | Future-proofing your prototype for expansion and innovation |
| Resource Allocation | Allocate resources efficiently for scalability | Optimising performance and cost-effectiveness |
| Planning for Growth | Anticipate future needs and plan accordingly | Minimising disruptions and enabling seamless expansion |
| Flexible Design Strategies | Adopt adaptable design approaches | Facilitating quick adjustments and accommodating new requirements |
Frequently Asked Questions
How Can We Ensure That Our Swift Prototype Is Accessible to Users With Disabilities?
To ensure your swift prototype is accessible to users with disabilities, prioritise accessible design and inclusive user experience. Incorporate features like alternative text for images and proper colour contrast to make your prototype more inclusive.
What Are Some Tips for Integrating User Feedback Into the Rapid Prototyping Process?
To integrate user feedback into rapid prototyping, involve users early on and analyse their feedback. This iterative process allows for rapid iteration and ensures that user involvement is a central part of your development approach.
How Can Cross-Functional Teams Effectively Collaborate on Swift Prototype Development?
To effectively collaborate on Swift prototype development, prioritise effective communication and foster strong team dynamics. Encourage collaborative problem solving and iterative testing to drive innovation and create successful prototypes.
What Are Some Common Pitfalls to Avoid When Implementing an Agile Development Methodology for Swift Prototypes?
When embracing agile development for swift prototypes, beware common pitfalls like overlooking accessibility and neglecting user feedback. Stay nimble, adapt, and iterate. Blend innovation with discipline to avoid stumbling on the path to progress.
How Can We Plan for Scalability in the Architecture of Our Swift Prototype?
When planning for scalability in your Swift prototype’s architecture, consider future growth and flexibility. Incorporate modular design and cloud-based solutions for scalability planning. Architecture considerations should prioritise adaptability and performance optimisation for innovation.
Conclusion
In conclusion, swift prototype development requires:
- User-centric design
- Rapid prototyping tools
- Feedback loops for continuous improvement
Collaboration, agile methodology, and continuous testing are crucial for success.
Embrace iterative improvement and scalable architecture planning to ensure a streamlined process.
Remember, practise these best practises with passion and precision to produce top-notch prototypes.
Contact us to discuss our services now!